Sunday, February 9, 2014
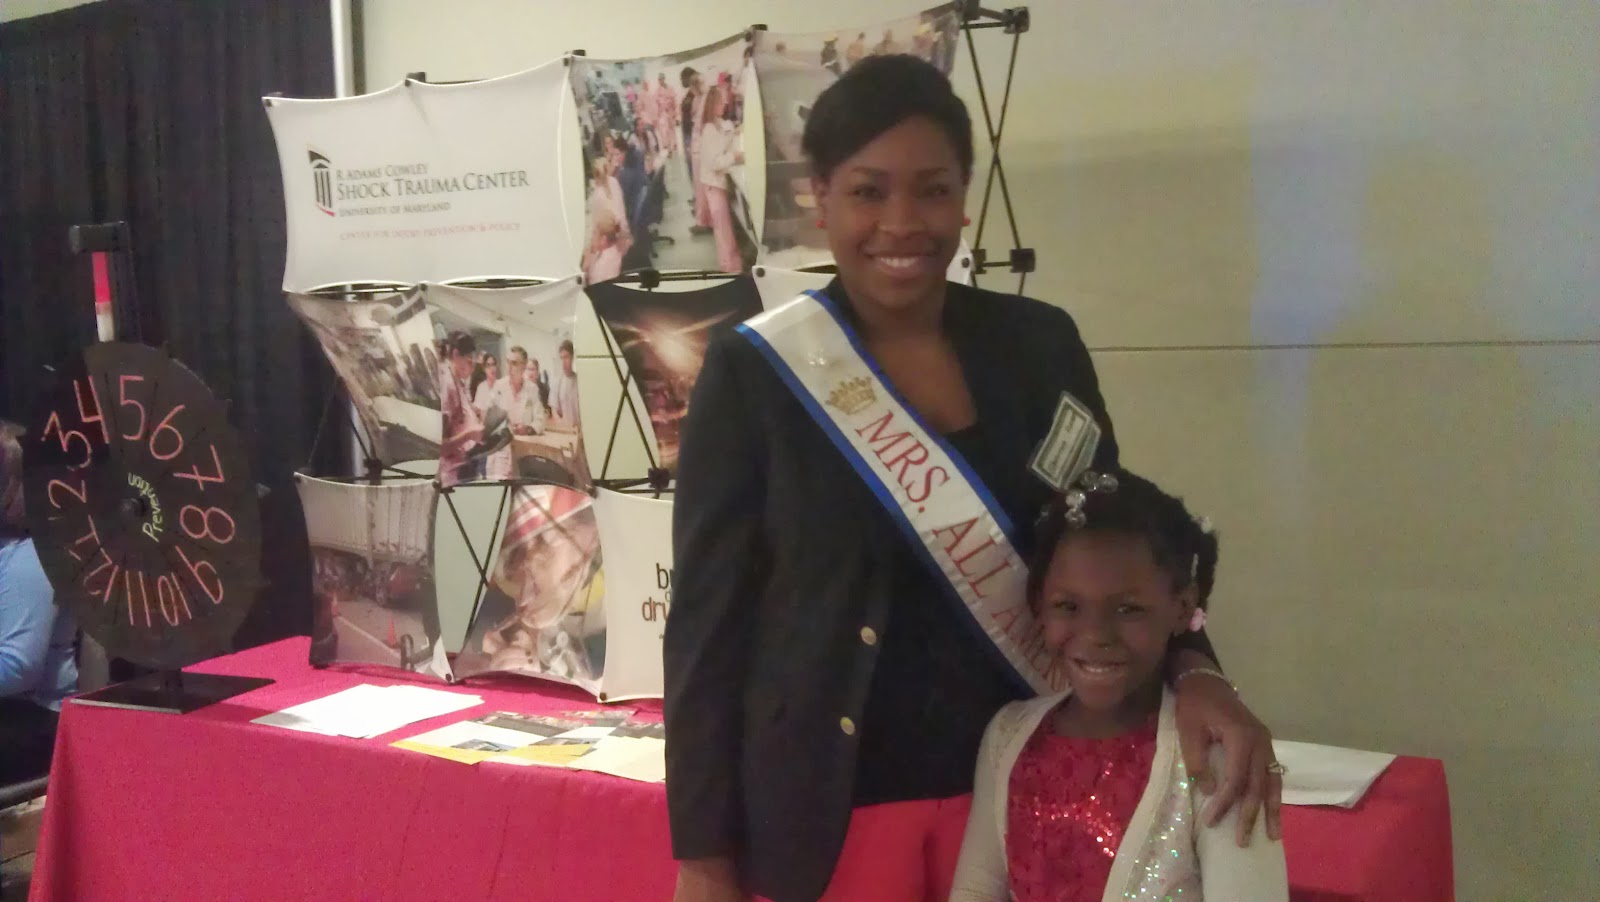
Mrs. All American made an apperance at Motor Trend's International Auto Show
I am very excited to say that I made and appearance at Motor Trend's International Auto Show....what? You got that from the title? You are so insightful. Any who, here are the pictures!


Thursday, January 23, 2014
Pagent Sash Easy DIY
This weekend has been a complete and total whirlwind. I was named Mrs. All-American! I am over the moon right now and can't wait to serve for the next year! The women that I met this weekend were absolutely phenomenal. I am so happy to have been able to meet such great women!
Okay, so on to the DIY project.
Why?
My pageant started on a Thursday night and with it being a weekday, my husband and I decided we did not want our our daughter to miss school for a pageant. What kind of example would I be if I allowed that to happen?! Needless to say she was a bit bummed about not being able to go.
My mother also decided to take time out of her busy schedule to travel and help me get things together. My mom is such a great sound board when it comes to organizing my thoughts.
I thought it would be great if I could give them something to show my appreciation so I came up with personalized sashes!
How?
This was a fairly easy project. Your supplies are as follows:
1. 3'' White Ribbon (if you can find 4''
2. Lighter
3. 3/4'' iron on hemming tape
4. 1'' color ribbon
5. scissors
6. Velcro tabs
7. Iron and Ironing board

Step 1: Cut your wide and two strips of your 3/4 width ribbon based on the length below.


Okay, so on to the DIY project.
Why?
My pageant started on a Thursday night and with it being a weekday, my husband and I decided we did not want our our daughter to miss school for a pageant. What kind of example would I be if I allowed that to happen?! Needless to say she was a bit bummed about not being able to go.
My mother also decided to take time out of her busy schedule to travel and help me get things together. My mom is such a great sound board when it comes to organizing my thoughts.
I thought it would be great if I could give them something to show my appreciation so I came up with personalized sashes!
******Disclaimer******
My photos are not very good. I was attempting to quickly make the sashes while my daughter was at a wrestling seminar. As a result, the photos are not the best.
How?
This was a fairly easy project. Your supplies are as follows:
1. 3'' White Ribbon (if you can find 4''
2. Lighter
3. 3/4'' iron on hemming tape
4. 1'' color ribbon
5. scissors
6. Velcro tabs
7. Iron and Ironing board

Step 1: Cut your wide and two strips of your 3/4 width ribbon based on the length below.
Adult
Teen - 62" long
Standard Adult - 72" long
Large Adult (height 6'1"-6'4") - 80" long
XL Adult (height over 6'5") - 88" long
Teen - 62" long
Standard Adult - 72" long
Large Adult (height 6'1"-6'4") - 80" long
XL Adult (height over 6'5") - 88" long
Teen
52" long
52" long
Toddler
42” long
42” long
Step 2: melt the edges of the ribbon with the lighter. I do this by running the edge of the ribbon along the blue part of the flame. The white top is too hot and will scorch your ribbon. You just want to melt the ends to seal and prevent fraying.
Step 3: line the underside (not shiny side) of your colored 3/4'' ribbon with the hem tape and iron. Follow directions on the package. My package said to iron each section for 10-12 seconds so I moved the iron very slowly, feeding into the process. Tip: the paper peels better when it's warm so if you find that the paper is sticking to the adhesive run the iron over it again and it will glide off.


Step 4: When finished with Step 3, peel the paper off then set adhesive side down on the edge of the wide ribbon. I like to leave the edge of the ribbon out. I prefer the look. Iron again shinny side up (be aware of heat setting and material using) according to package directions.


Step 5: Repeat on other side of wide ribbon.

Step 6: Now you want to add your lettering. I chose the iron on black felted lettering (not athletic). Cut your letters out. Tip: make sure to leave a uniformed amount of space at the bottom of each letter so that you can ensure that the letters as you have placed them are as straight as possible. Iron the paper side of each letter and let it cool. Flip the ribbon over and repeat on the other side.

Step 7: Let the letters cool and peel the paper off. This is what you will get.

Step 8: Fold the ends of the sash under and use more iron on tape to secure for a clean edge. Use velcro tabs to keep the ends together. I don't have a picture of this. I used snap closures but I do not suggest this for you. The ribbon is very delicate and my heart stops every time I try to open and close it for fear that it may rip.


This is a very easy project and I hope it turns out well for you too!
Saturday, January 18, 2014
Pageant Crafts: My Fashion Wear Gown & Contestant Gifts
So I am currently at the Mrs. All American National Competitions.....AHHHHHH....This is so exciting. So I promised a while back to post my DIY gown in white. (see previous post) I decided to go with another dress. I do not have pictures of this but it was very simple.
I decided to use a one shoulder black peplum cocktail dress and decided to add a removable tutu skirt. It all started with the sketch.

1. cut ribbon waist length (I made mine a little short to leave it open in the front.
2. sew 6 yards of tulle to one side of the ribbon, 19 yards to the other side. Choose which side looks better and sew 2 yards of organza to the underside.
3. At waist band iron the tulle as flat as you can and sandwich with two more pieces of ribbon for finishing. I left mine long so that I can tie it to anything.
4. Add a broach for detail. I went with peacock feathers...I was a little proud.
This is what I got:


Hopefully, I can get some better pictures. This will be the dress I wear for the Fashion wear portion of the pageant. Big fun!
I have also had to put together a contestant gift which is a small gift that you give to the other ladies as a gesture of good will. The value should not exceed $5 per gift. I went to my local (and fantastic) dollar tree and came up with a box of notions that could be of use during the weekend for the ladies.


I decided to use a one shoulder black peplum cocktail dress and decided to add a removable tutu skirt. It all started with the sketch.
1. cut ribbon waist length (I made mine a little short to leave it open in the front.
2. sew 6 yards of tulle to one side of the ribbon, 19 yards to the other side. Choose which side looks better and sew 2 yards of organza to the underside.
3. At waist band iron the tulle as flat as you can and sandwich with two more pieces of ribbon for finishing. I left mine long so that I can tie it to anything.
4. Add a broach for detail. I went with peacock feathers...I was a little proud.
This is what I got:
Hopefully, I can get some better pictures. This will be the dress I wear for the Fashion wear portion of the pageant. Big fun!
I have also had to put together a contestant gift which is a small gift that you give to the other ladies as a gesture of good will. The value should not exceed $5 per gift. I went to my local (and fantastic) dollar tree and came up with a box of notions that could be of use during the weekend for the ladies.
I found the tuxedo boxes in the wedding section and filled it with 2 sided fashion tape, 4 straight pins, one Band-Aid, 3 bobby pins, 2 mints and one cough drops. I also included tissues but I wrapped them since they would not fit inside.
Well, I have to run to go to rehearsal right now but I will be back soon with another craft from this weekend!
Up Next: DIY Sashes!
Thursday, December 12, 2013
I moved!
Hey there! It's been too long since I've posted (gosh that is the kiss of death phrase typed by every blogger whose site will soon meet it's early demise!).
He's what is happening in my neck of the woods.

So I moved! Yup Now I'm in Maryland...not far but damn if it wasn't tedious! I now have a home office which is a welcomed addition.


...and speaking of additions we now have a new member of the family. Not a baby...silly. A cat. A curious, adventurous 8 month old black kitten named midnight. Hey, my daughter asked for a cat or a brother...easycall.

What else? Oh yeah, I am now Mrs. Maryland All American and soon to be (hopefully) Mrs. All American. I compete January 17, 2014!


Ok. so that's me- now on to the meat and potatoes (or just potatoes for my vegetarian friends). The reason we are all here tonight...What is on my DIY plate?
Project 1:
Our new place has these great windows taking up 2 walls in our living room. We get great sunlight during the day (and we are finding we lose a lot of heat at night) but it has been a complete and total nightmare to try and cover them. There are 6 floor almost-ceiling window panels closely gathered plus one large picture window in the dining area. Now I understand why people hire someone to do this job. My first attempt was curtains...simple darn curtains..So I get the first set of rods, too short, so I returned them and got the second set...just right. Then Curtains...I found a set I loved but there weren't enough of them (6+ windows remember)...then I found some I liked but they were mismatched...Then I found some I liked-all matched-they were too narrow! So I gave up for now on curtains and I have decided to do a privacy window project. I found a great pattern that I loved (at a price I love) and it is lovely!


but sooooooooooooooooo much work. I tried finding a die-cut to use but I have to trace a template and cut out by hand....suffice to say I'm going on week 3 of this project.


Project 2:
I want to turn this old gown:

Into this:

He's what is happening in my neck of the woods.

So I moved! Yup Now I'm in Maryland...not far but damn if it wasn't tedious! I now have a home office which is a welcomed addition.

I would say that my work space is this clean all the time, but no one likes a liar.

Personal wall

My office is right off of the livingroom.


I love this poster!

baby me!


Art work from my baby girl.
...and speaking of additions we now have a new member of the family. Not a baby...silly. A cat. A curious, adventurous 8 month old black kitten named midnight. Hey, my daughter asked for a cat or a brother...easycall.

Say "Hi" Midi!
What else? Oh yeah, I am now Mrs. Maryland All American and soon to be (hopefully) Mrs. All American. I compete January 17, 2014!

Ok. so that's me- now on to the meat and potatoes (or just potatoes for my vegetarian friends). The reason we are all here tonight...What is on my DIY plate?
Project 1:
Our new place has these great windows taking up 2 walls in our living room. We get great sunlight during the day (and we are finding we lose a lot of heat at night) but it has been a complete and total nightmare to try and cover them. There are 6 floor almost-ceiling window panels closely gathered plus one large picture window in the dining area. Now I understand why people hire someone to do this job. My first attempt was curtains...simple darn curtains..So I get the first set of rods, too short, so I returned them and got the second set...just right. Then Curtains...I found a set I loved but there weren't enough of them (6+ windows remember)...then I found some I liked but they were mismatched...Then I found some I liked-all matched-they were too narrow! So I gave up for now on curtains and I have decided to do a privacy window project. I found a great pattern that I loved (at a price I love) and it is lovely!

before

the plan

after.
find the project here: 7th house
but sooooooooooooooooo much work. I tried finding a die-cut to use but I have to trace a template and cut out by hand....suffice to say I'm going on week 3 of this project.

the spaces aren't uneven because I lack a tool to make a uniformed pattern, no. It's uneven because I'm extremely impatient. Admitting it is the first step to recovery.

why soooo many windows!!!
Project 2:
I want to turn this old gown:

Into this:

Although the photo doesn't show it, generally speaking, the fit is similar. Fitted in the waist and opening to a trumpet. I'm doing this pageant thing and I'm thrifty what can I say....I wonder how it will work out..We shall see tomorrow!
Commencing: Operation Swag like Eva Mendes!
Monday, September 9, 2013
Living life to the fullest

Life is precious. Unfortunately it's not until you are faced with the possibility of it ending that people tend to notice. This post is just to remind us all how special life is without any sad reminders. Have a great day.
Subscribe to:
Posts (Atom)