Stupid Ugly: [stoo-pid, styoo‐]+ [uhg-lee] adj.
1. very unattractive or unpleasant to look at; offensive to the sense of beauty; displeasing in appearance and dully tediously dull, especially due to lack of sense; inane; pointless.
2. Useless and horrid at the same time.
-used uncommonly to describe rooms that have useless knickknacks and offend the visual senses. Rooms that make you feel like you have become dumber by walking into them. Room that make you question if "sight" is a blessing curse.
Orgin: [C16: from French stupide, from Latin stupidus silly, from stupēre to be amazed] combined with 1200–50; Middle English ugly, uglike < Old Norse uggligr fearful, dreadful, equivalent to ugg ( r ) fear + -ligr -ly.
Yes...it is THAT bad...Don't believe me, huh? Okay, but remember that you have brought this on yourself....Here are pictures.

Extremely unorganized bookcase

The last tube TV alive

Hubby on the sofa playing games

The hub's granny's table- which he protects more than myself and the child.
Uggg. I can't take any more..I may get sick!
Okay maybe it's not that bad but as an adult woman who works VERY hard and has not made ANY large purchases (other than the cars we need to get to work) I think I deserve a remodel.
Now, the next thing you need to know about me is that I am frugal. My mom knows it, as does my husband, sister, daughter, boss...you get my drift.Its so bad that when I brought up the idea of new furniture my mom and sister talked me the whole way to the store, my boss called my cell to make sure I wouldn't get sticker shock and chicken out and my 5 year old sat in the back saying "cheeeeep, cheep, cheep cheep!..I got the hint guys!
Before diving into my project, to make myself feel better I had to justify the spend. So I found places in my annual budget that I could cut back like the $84/month I pay into a storage unit that I only visit once a year and I also found ways to offset my costs by selling things I was getting rid of (still working on).
Next, I researched my preferred style. It changed probably 5 times before I settled on this look for my inspiration....


aaaaaaaahhhhhhhh! So posh, so elegant...so clean....(note to self).
I started by de-cluttering my home (still working on...too...much...junk...)
Next I went shopping for my new furniture. I found lots of styles that I loved and also discovered that I have Champagne taste and beer pockets! Dang it!
I loved this but it was more than I wanted to pay for an APARTMENT with a small child...one day my love, we will be together.

I settled on this look instead.
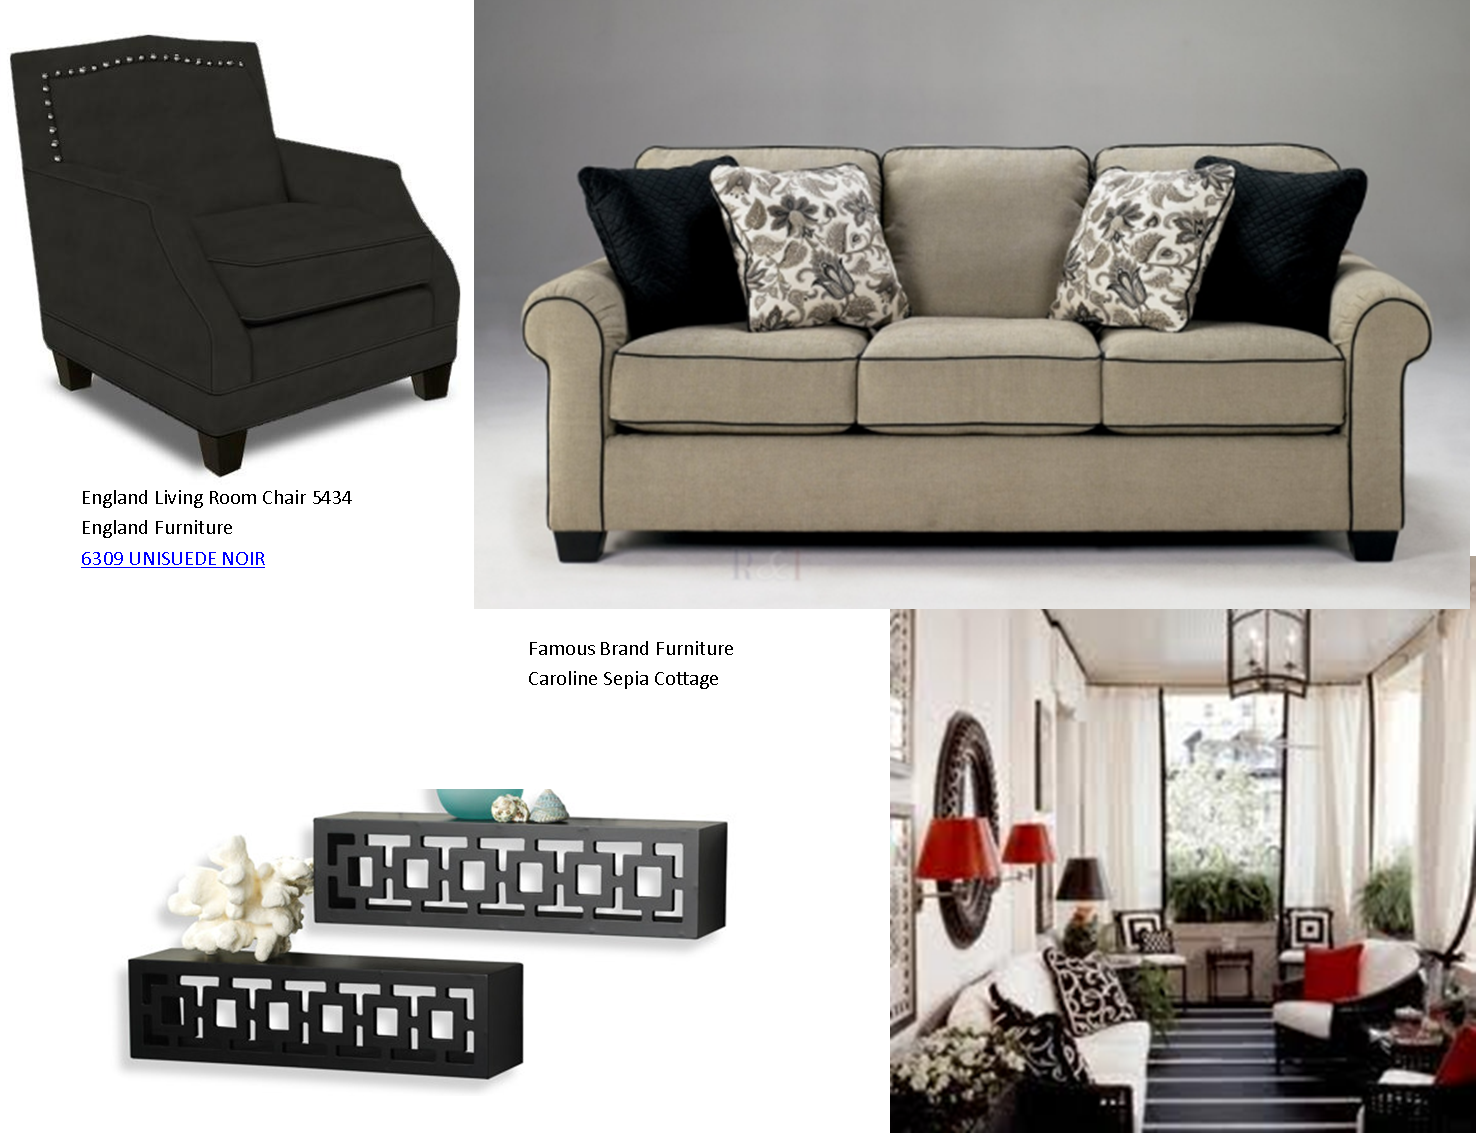
the new look will include on sofa and two arm chairs...similar to that sofa I wanted in black micro suede. Livable and classic.
Okay so get to DIY...I hear ya!
So once I get the furniture in (10 days or so) I need to have everything else ready to match the inspiration. The two things that stand out the most to me are the gold accessories and the color coordinated book case. I started with the accessories. I could have gone out and bought some gold items, I realize that. But, I am more of a project woman so I went to Michael's Arts and Craft store to pick up some gold metallic acrylic paint and a sponge brush. Then I dug through my closets. There were SO many things I found that I could just paint to make it work. I also went to Bed Bath and Beyond for shelves as well as a local junk antique shop for items.

Metallic paint and sponge brush came to a bit under $4.00

Shelf from Bed Bath and Beyond on sale for $19.99 $9.99! Score!
Also found cast iron hooks hooks for the wall at $4.00 each and various frames in the closet for free.

So here is what my collection looked like after painting!

I am really looking forward to seeing the geometric shelves hung on the wall!
I also noticed the gold lamp shades in the inspiration photo. I have two tall floor lamps with white shades...lets paint those too. The one thing that I did and suggest is remembering that since these
are lamp shades they will look transparent when on- meaning an uneven painting job or product will leave it looking streaky.
To fix this I used Krylon's Black and Silver for plastic spray paint on the inside.
The black stops the light from showing so much on the outside and after it dried I sprayed a layer of silver to help heighten that light source that we are cutting a bit. This is what the INSIDE of the lampshade looks like. BE SURE THAT YOU HAVE A LAMP THAT HAS ENOUGH SPACE TO NOT CAUSE A FIRE FROM HOT BULBS! I was confident in this process for me because on the lamp I use the shade and bulb never come in contact. the shade attaches to the base of the lamp head, followed by a large plastic washer to keep it down and I use Energy efficient bulbs that do not get as hot as traditional bulbs. Team that with the fact that we rarely used the lamps in the first place and it made sense. BE CAREFUL!

This is the outside painted

And powered on.

Tada! see what I mean about the silver inside?
Lastly I tackled the bookcase but that will be in another post. I had a moment of DIY genius! Click the post "Turning Pages" to see how I took this...
And created this!

Things are shaping up!