Thursday, December 4, 2014

Christmas DIY: Twine wrapped bottle

I like wine. As a result I have some pretty interesting bottles around the apartment. I usually accumulate a few with plans to "do something" with them. I go on Pinterest for ideas, don't find any I like and eventually I get tired of looking at them (and feeling like a hoarder) and they make their way to the recycling bin. Well, I'm happy to say I have finally found a project that I love! This is very easy to do and I may do a few more! I would count this project as a "win" but I also want to share some tips with you to make it an even better success for you.

For this project you will need:
Twine
Glue gun
Glue sticks (lots-if you think you have enough get more)
Glass bottle
Berries from floral department
Time


TIP: The first tip I have is on the Twine. Aside from the bottle (and time) I was able to get all my supplies from the dollar store. I purchased a 3 pack of twine from the hardware section and while it served the purpose- I paid for my frugalness in time. The Twine I picked up was very thin and sometimes had rough sections in it. I would suggest finding a thicker twine which I think would save time on this project. Because of my twine, my project took about 4 hours. I would imagine buying a better quality twine (and not getting distracted) could cut this down to 1 hour.

To begin you will need to squeeze a dab of hot glue on the mouth of the glass bottle and attach your twine end. Be careful not to burn yourself.


TIP: I have seen people use other types of glue. I prefer the hot glue because it dries quickly and spillage can be reused. If you have any glue that has squeezed through the rows of twine simply touch with the tip of your gun to smooth out or reposition your string.


Work your way down the bottle, keeping your twine tight. You do not want any gaps between each row. I chose to squeeze glue along the entire line rather than adding glue in dots. I haven't tried it the other way but I think it give you a smoother look and secures the line very well. When you are finished you can add any decoration to the front. I made my bottles to add to my Christmas display but I may want to use it after so I used a flat ornament and draped it around the neck of the bottle like a necklace. After Christmas I can easily remove the ornament and it will work year round.


Wednesday, October 29, 2014

We wear the masks 2

I thought about adding doo-dad's and various things to my mask but after the glaze I realied less is more. I added 4 rhinestones. This is the result.


Happy crafting ya'll! 

Tuesday, October 28, 2014

We wear the masks....

It's the time of year when you get to choose what face you wear and parade as someone else for a day without being trucked away in a new custom tailored winter white wrap jacket. Halloween.

I like to participate just like any other drama camp deprived kid turned adult so I get into the festivities, stage makeup style. My daughter has chosen a witty costume. German tavern girl dress + brown child= German Chocolate. (This kid is a riot)


I haven't decided if I want to be a comic book or a black and white movie character but either way, I'll be sure to share it with ya.

After halloween, I will be attending a masquerade ball! I have wanted to go to one for quite some time so off course I had some plans on attire and a coordinating mask. I decided to DIY my mask and I am thrilled with the results, hence why I am sharing my project before it's been completed.

I started with a mask from Michael's Art Store. It set me back $4.99 (big spender). I had the other supplies but if you do not they are not expensive.


You will need:

1 mask (plastic)
Black acrylic paint
gold metalic paint
1 small round acrylic brush
1 flat medium acrylic brush
pencil

First, paint your mask with acrylic paint. I used 3 coats of paint painted in short strokes until almost dry to give my mask the appearance of hair since my mask is a cat shape. It helps if you tie the ribbons on the mask together. There were a few times I almost dropped the mask while wet and the string was the only way to catch it workout ruining my project.


After the black paint is dry use a #2 pencil to sketch a pattern. This process is important and if you make a mistake you can erase without a problem.


Once you are satisfied with your sketched plan paint using your metalic paint and small round brush. Take you time with this step. If you rush, it will show. I tried using a metalic sharpie instead of paint. I do not suggest it.


The results were very dull. 

In my normal impatient manner, I could wait to go to the store for metalic paint so I opened a metalic paint pen. More work than necessary but, wowzers-the results are amazing!


This is what I have so far. I would like to go back over the stray gold brush strokes with my black paint again, seal with a matte protectant and I'm thinking about adding rhinestones and/or feathers. I really love the result and although I would love to add a lititle sparkle I don't want to ruin a good thing.

This would be a great project for anyone still looking for a low maintainace halloween costume with umph.

Well, until next time happy crafting ya'll!


Friday, July 11, 2014

Mom-jitsu: Training Style

One of the hardest things to figure out since I started training in Brazilian Jiu Jitsu (other than spelling it correctly) is figuring out how to style my half natural/half text-laxed hair to protect against damage and without looking like horrid out of the dojo. Here are a few solutions I have come up with.

1.  Multi-ponytail faux French braids. This one works really well for both my daughter and myself. Many people advise against using rubber bands. I use them but instead of attempting to remove them-which is when damage occurs- I cut or break them to get them out. I figure there is a reason that they sell them by the gazillions. I got the idea for this style from Chocolatehairvanillacare.com.

2.  Pinned under French braid. This works ok but on my hair looked like a hot mess after sweating.

3. Crochet braids with Marley Hair. This is the best option yet. Because of the texture of the added hair, the more weathered the real hair gets, the more natural it looks. I roll the sides and bun the back during training and shake it out when I am finished and it always looks good. Funny thing is, you would expect that it would get worse with time. WRONG-O. The more your natural hairline gets frizzy the more natural it looks!


4. Braid out. This is a good option because it holds during training and- if planned well- can lead to a nice braid out curl style. This photo comes from justgrowalready.com.


I'll add styles as I run accross them but you know I have to give you examples of things that DID NOT work. DON'T try these.

1. Braided updo/bun with added hair.


 It's beautiful. It can't get caught. It's good to go right. NOPE!


This style put's your edges at risk ladies (and gents)! As if the tension on the hairline wasn't bad enough, just imagine trying to escape a choke but you can't because you can feel the hairs pulling. don't do it. On bjiujitsu.blogspot.com, the blogger recounts Nyjah Easton's experience like this:

"I decided to try braids and of course after you get over the week of barely being able to move your head from the tightness freshly done braids and cornrows add, they too would often get caught. I've actually had a full cornrow rip out and pull all of my hair along with it."

Are you serious? No thanks! This may work if you use your own hair and bun it really tight but I haven't tried it so I can't speak on it.

2. Super long box braids/twists...sigh....I'm ashamed to say that I thought this was an option...Bad idea...seriously. They got caught a lot in addition to all issues contained in section NOPE.1

3. Scarf. If it slips off in bed, it WILL slip of on the mat. 'Nough said.


I will update as I find viable options. Deuces!


Thursday, July 10, 2014

Burn Bling

Did you know you could buy candles/soaps/potpourri beads and get jewelry inside? How did I miss this and what better way to start videos on the blog? WIN-WIN!  I ordered a Prize Candle and I will be updating soon with the reveal!

Yes- I'm hype...I know.

Monday, March 31, 2014

April Fools Day Friendly Fire!

I like pranking. I don't like being pranked but I like pulling them. This year I will be pulling some friendly pranks of my family. Why? I'm glad you asked....


It all started on a snowy day in December. I am not a fan of snow. I don't think it's cute. I don't make snowmen and I just made my first "good" snowball at the age of 29. Seriously, don't like the stuff. Well, my dear loving family and neighbors lured me outside one day by using my sweet little girl. I remember it like it was yesterday. She came in the house and said "Mommy, can you come play with me" then used the puppy eyes I taught her to use on Daddy. Traitor! As soon as I come outside I was snowed from 3 different angles. OOOOOH but that wasn't the worst part...They put a snowball down my back on the inside of my coat! What the what?!


Fast forward back to present day. I have let bygones be bygone so I will not retaliate with anything bad but I will have a little fun. ;  )

This year no foods are what they seem. The moral of the story, don't bite the hand that feeds ya!


April Fools Day Menu

Breakfast: 
Eggs over easy
Toast
Fresh fruit

Lunch:
Grilled Cheese
Peas and Carrots

Beverage:
Gatorade

There are other nutritious things that they will eat in the day but these are the things I have cooked up just for them.


Breakfast:

What they see: eggs over easy, toast and some fresh fruit. 
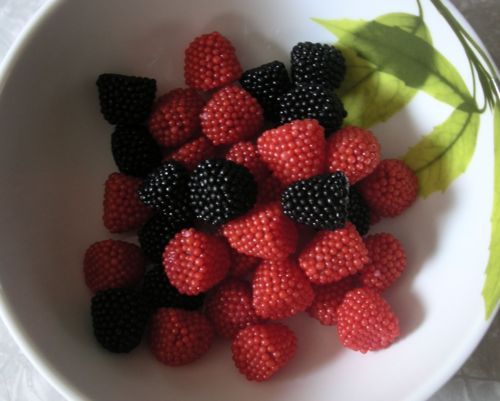
What they get: vanilla yogurt, apricot half, toast and gummy berries (just a few)

What you will need for this prank:
Vanilla Yogurt
Apricot or peach halves
Harboro Gummy Berries
Toast
Spoon


To make the eggs spread a dollop of Vanilla Yogurt on a plate to represent an egg yoke. It is very important not to use any fruit yogurt so that there are no fruit chunks on the plate. Next you will place one apricot half on top. Don't make it perfect. Eggs aren't imperfect. Side this with real toast and just a few berries. We don't want to overload 'em on sugar, do we? The best part about this is, other than the fake berries, this can be a pretty good breakfast.


April Fools Day~ vanilla yogut with an apricot half.  I am thinking this would also be cute as "green eggs and ham" for a Dr. Seuss party.  You'd jus have to add a little green jello mix to the yogut.
These are not my pictures. I will not make this until the morning but this is what it will look like


This will be the hardest meal to pull off because my husband doesn't eat eggs. I may have to let him in on the joke before hand. 


Lunch:

What they see: Grilled Cheese, Peas and Carrots
What they get: Pound cake, orange icing, starbursts and skittles


What you will need for this prank:
Massive bags of Skittles and Starbursts
a knife and cutting board/ culinary shears
sandwich bags


For the peas, simply sort the green candy out of the large bag of skittles

Next, open each starburst and cut it into quarters.


When you are finished, combine the starbursts with the skittles and voila! Peas and Carrots. 


Preparing the grilled cheese was a bit more involved. I took a shortcut buy purchasing a pound cake. I honestly suggest having your cake in a loaf shape if you attempt this. I was working with a short deadline so I took what I could get. 


For this prank you will need:
1 pound cake
grill/griddle/pan
whipped icing (spreads and mixes easily)
food coloring (see package directions for orange)
something to stir the color into the frosting


While your grill/pan heats up you can mix the color into your frosting. Make sure to follow the directions on the package. I used 5 drops of yellow and one drop of red.


as a last step, I compared the color to the cheese we had in the fridge. The color looks good.


Next slice your cake. try to make it as straight and consistent as possible and lay directly on your hot surface. Other sites have suggested adding butter but I found that the cake had enough oil in it already so I did not add any more.


If you use a grill like I did, you will get these realistic looking lines. Cool effect! 


 Next spread your colored icing to the non grilled side. Make sure ice completely to the ends to give the "cheese spilling over the side" effect. TIP: don't get too excited and ice before the slices cool down. I got a slippy slidey mess because I was overzealous!


Lastly, every grilled cheese needs to be cut into triangles- so do it. 


Beverage service:
What they see: Gatorade
What they get: Jello


This last one is just as simple as the others. If you can make Jello you can do this. Follow the directions on your package BUT pour your liquid into sports bottles.

For this prank you will need:
1 large bowl
Boiling water
cold water
sports bottles
one large container for the sports drink if you do not want to waste it.
Jello mix
1 funnel


Open your new bottles of sports drink and empty into your large container if you want to keep it.


Mix your Jello by the package directions. I chose orange to match the label...but then I mixed too much hot water and had to use my reserve strawberry mix.

Here are the directions in case you threw out your Jello package in haste.


After mixing your Jello use your funnel to get the liquid into the bottle. 


Refrigerate overnight. I will be taking this to my family Jiu Jitsu class tomorrow night as well as bottles of water for everyone. Okay so my revenge isn't so mean but it sure will be entertaining for me. I will post reactions tomorrow!