Showing posts with label child's room. Show all posts

Monday, May 14, 2012

Sharing is caring: D.I.Y. Natural Dolls

I found an article on Natural hair dolls for children on a blog I frequent regularly. Beads, Braids and Beyond is my go to place for care and styling advice for my mini me! One issue I have had is finding dolls that promote my daughters beautiful features. Although she has other dolls she plays with (Rapunzel of Disney's Tangled for example), I believe it is important for all children to have dolls that resemble themselves in their collection. I am thankful to be able to find "chocolate" (her word) babies but they still have bone straight hair! For those who know curl textures, my daughter is a "4A". Long and short of it, I wanted to share the post and link.  I hope to try this soon!
Ta-ta for now!


D.I.Y. Natural Dolls


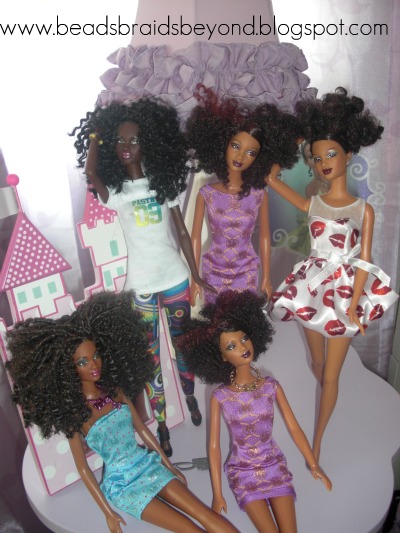
I was so excited to try the Natural Hair for Dolls Tutorial that I went out yesterday and bought a couple of straight haired So In Style Barbie dolls. I did it a little differently than Kristl but all methods produce beautiful results. A absolutely loves all her new dolls!

Below are the two dolls I purchased. Grace (blue dress) and Chandra (white tee). I bought them both at Walmart. Grace was almost $8 and Chandra was almost $12.


Pipe cleaners in

I started by parting off a small section of hair. I wrapped the end of the pipe cleaner around the section of hair near the roots so it would stay put. I then rolled the hair on to the pipe cleaner. I left a little space in between as I rolled the hair on. Once I got to the ends I folded the pipe cleaner over the ends then wrapped it around once or twice and cut the remainder of the pipe cleaner off. I continued this process for about 40 minutes to an hour until I was finished. I then dipped her hair into a pot of boiling water for a 10 count,as Kristl mentions in her tutorial. I left the pipe cleaners in overnight. I removed them in the A.M. and separated her curls. I cut all the straight ends off.
Pipe cleaners in/the back

After removing the pipe cleaners

The back after removing the pipe cleaners

Separated the curls and viola! Big hair!

The back

For Chandra, I knew I wanted a different curl pattern, so I did the same exact process as above, only I parted off much larger sections so she didn't have nowhere near as many pipe cleaners in her hair. After dipping her hair into a pot of boiling water I only left them in for about 3 hours, removed the pipe cleaners and separated the curls.

Pipe cleaners in

And out

Separated

Natural dolls!

Grace and Chandra after their makeovers.


Monday, March 12, 2012

Luminati de Flora

Okay so I completely made up the heading. Don't bother trying to translate. It's a mix of my sorry attempt at Italian and the text from a Fancy Nancy book.

Speaking of Fancy little girls, My daughter's birthday just passed and so we are in the process of redoing her room. She is currently still using her toddler daybed (crib without one side) so it is well overdue. One of the things I surprised her with is a lighting fixture with as much flare as her. I found the craft on various sites but nothing quite like what I wanted to create. I wanted to create a DIY Chandelier. I ended up using artificial flower petals from the Dollar Tree, A wire planter that I had laying around (tired of the neighborhood kids flipping over my inpatients!), needle, thread and eventually a hot glue gun.

I apologize for the poor pictures....really have to fix my digital camera...or upgrade my phone.

1. I started with the wire hanging basket and added a middle layer of ribbon to be able to attach the middle layer of cascading flower petals. One recommendation I suggest if you attempt this craft is to start with a basket close in color to your petals. Black basket and white flowers...not a good idea...but I was too excited to want to paint and wait for it to dry!

2. The next step is to organize your flowers by how you want to arrange them. I started with bouquets of flowers so I had to remove the petals from the stem and cut them into individuals. It doesn't take long at all.

3. Next start with your top row. I initially started by folding the petals over the top of the basket (open side) and SEWING them on. Yes it will be secure but my goodness it takes forever!

4. After my top row is done I hot glued the petals in a cascade formation. Think of them being like the monkeys in a barrel of monkeys game. They are only close enough to hold on to each other. For me each cascade was 6-7 petals long (including boarder).

5. I did the same with the second and third layers. My first layer was white, second was light pink (and attached to ribbon) and third was hot pink. In the end I attached a few clear beads I had laying around for kicks. May remove them since I'm not crazy about them.

In the end I had this....


Seriously, If I can do this-anyone can. All it takes is a little patience. Happy Crafting!